Sell personalized products on Shopify without missing a step
A visual, step-by-step publishing page built from the PrintMelon help guide. It walks users from choosing a personalized product to syncing client engraving details in Shopify.

Everything you need to set up personalized products and successfully fulfill custom orders.
T

Total 10 Steps
From product selection to publishe status
Processing Time 1 min
Product can appear in Shopify Products listing after publishing
Destination Shopify
Use your connected Shopify store as the publishing destination
Prepare your personalized product for Shopify.
Before publishing your personalized product, make sure you’ve selected an eligible product and have everything ready for a smooth setup.
A personalized product selected in PrintMelon.
A connected Shopify store.
Product title, pricing and variants ready.
A personalization app installed on Shopify.
10 steps to sell personalized products from PrintMelon to Shopify
PrintMelon’s Shopify personalization workflow starts in the Products page. You’ll select a personalized product, configure its settings, publish it to Shopify, collect customer personalization, and submit it to PrintMelon for production.
Step
1
Navigate to "Products" Page
Go to the “Product” page and select a Personalized product. Not all products can be personalized at the moment. Personalized products have the word in the title.
• Use filters if you have a large product catalog.
• Only products marked as Personalized support personalization.
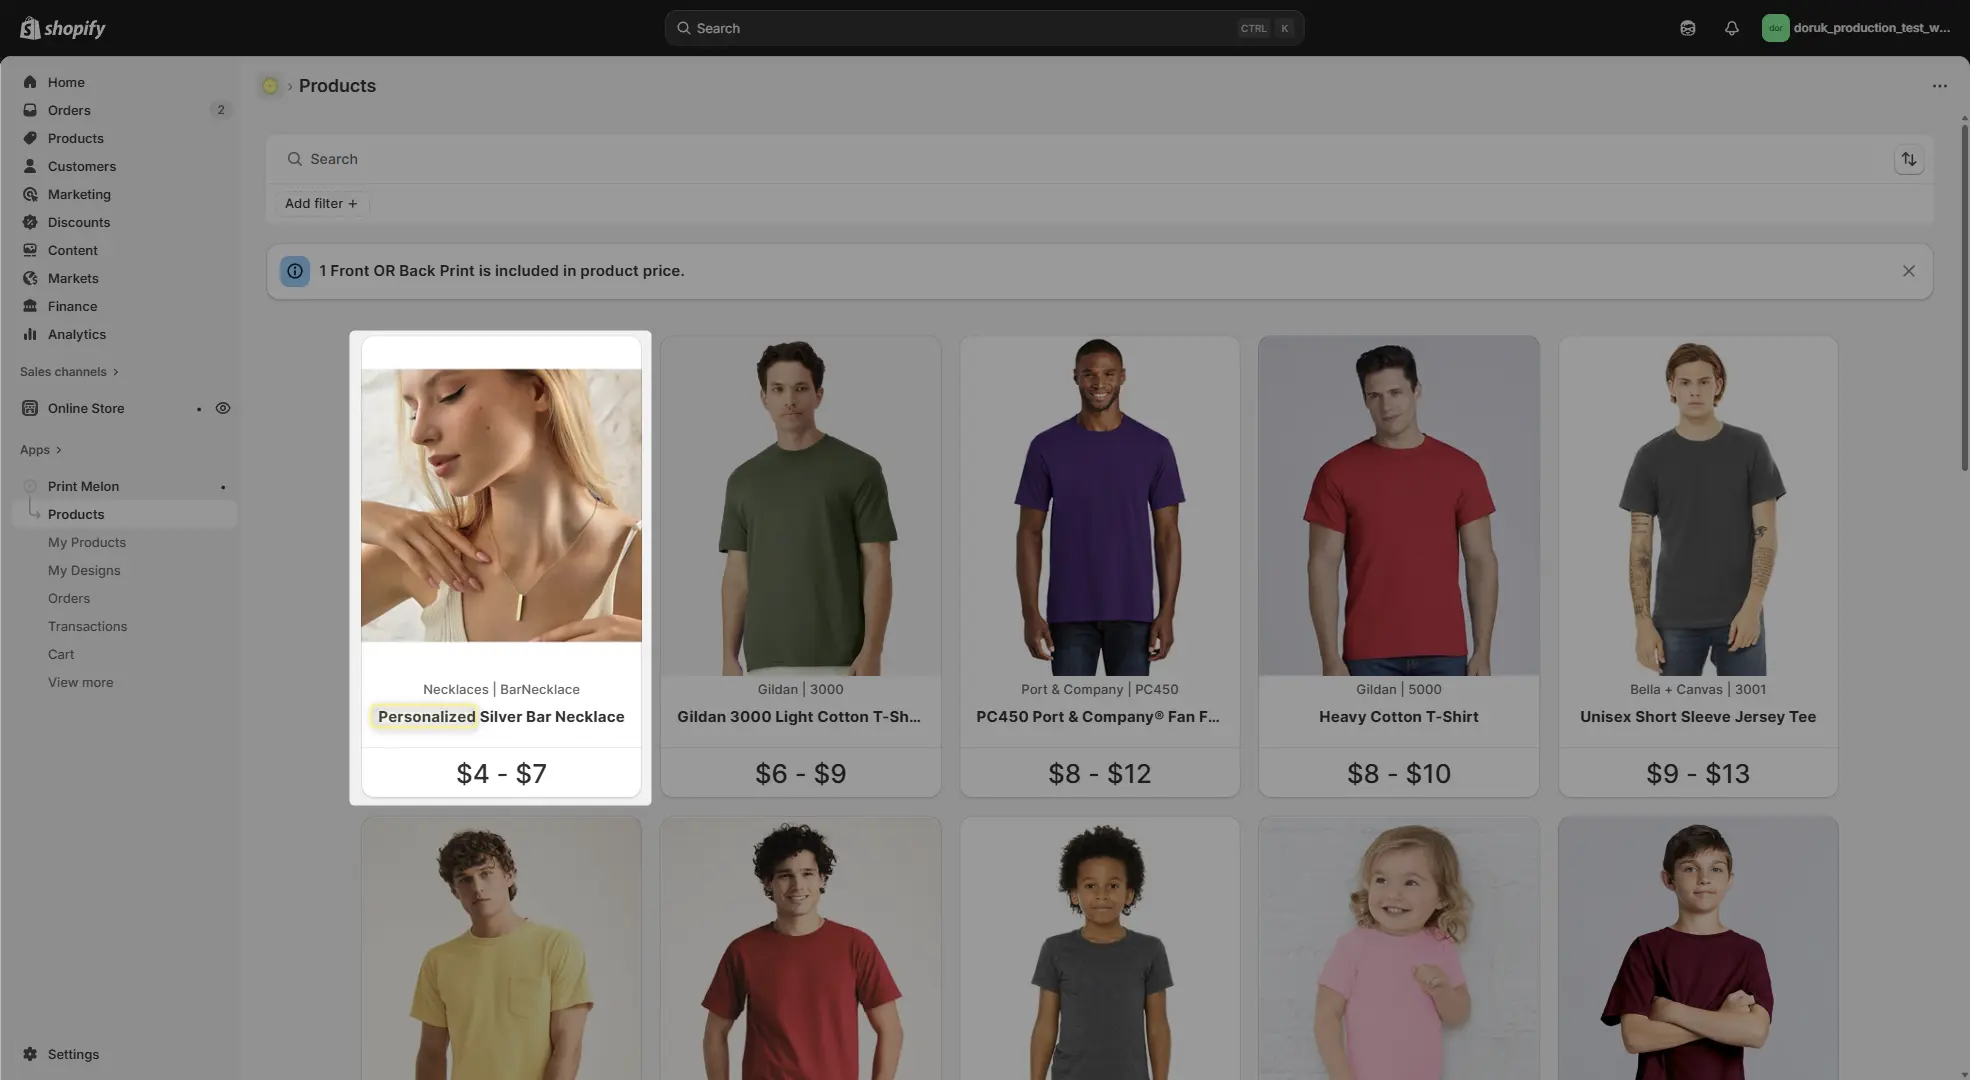
My Products screen and product selection
Step
2
Click on "Start Design"
On the product page, review the available personalization options, then click Start Design to continue.
• Product pricing changes based on the number of engraved sides.
• Available fonts are listed in the product description.
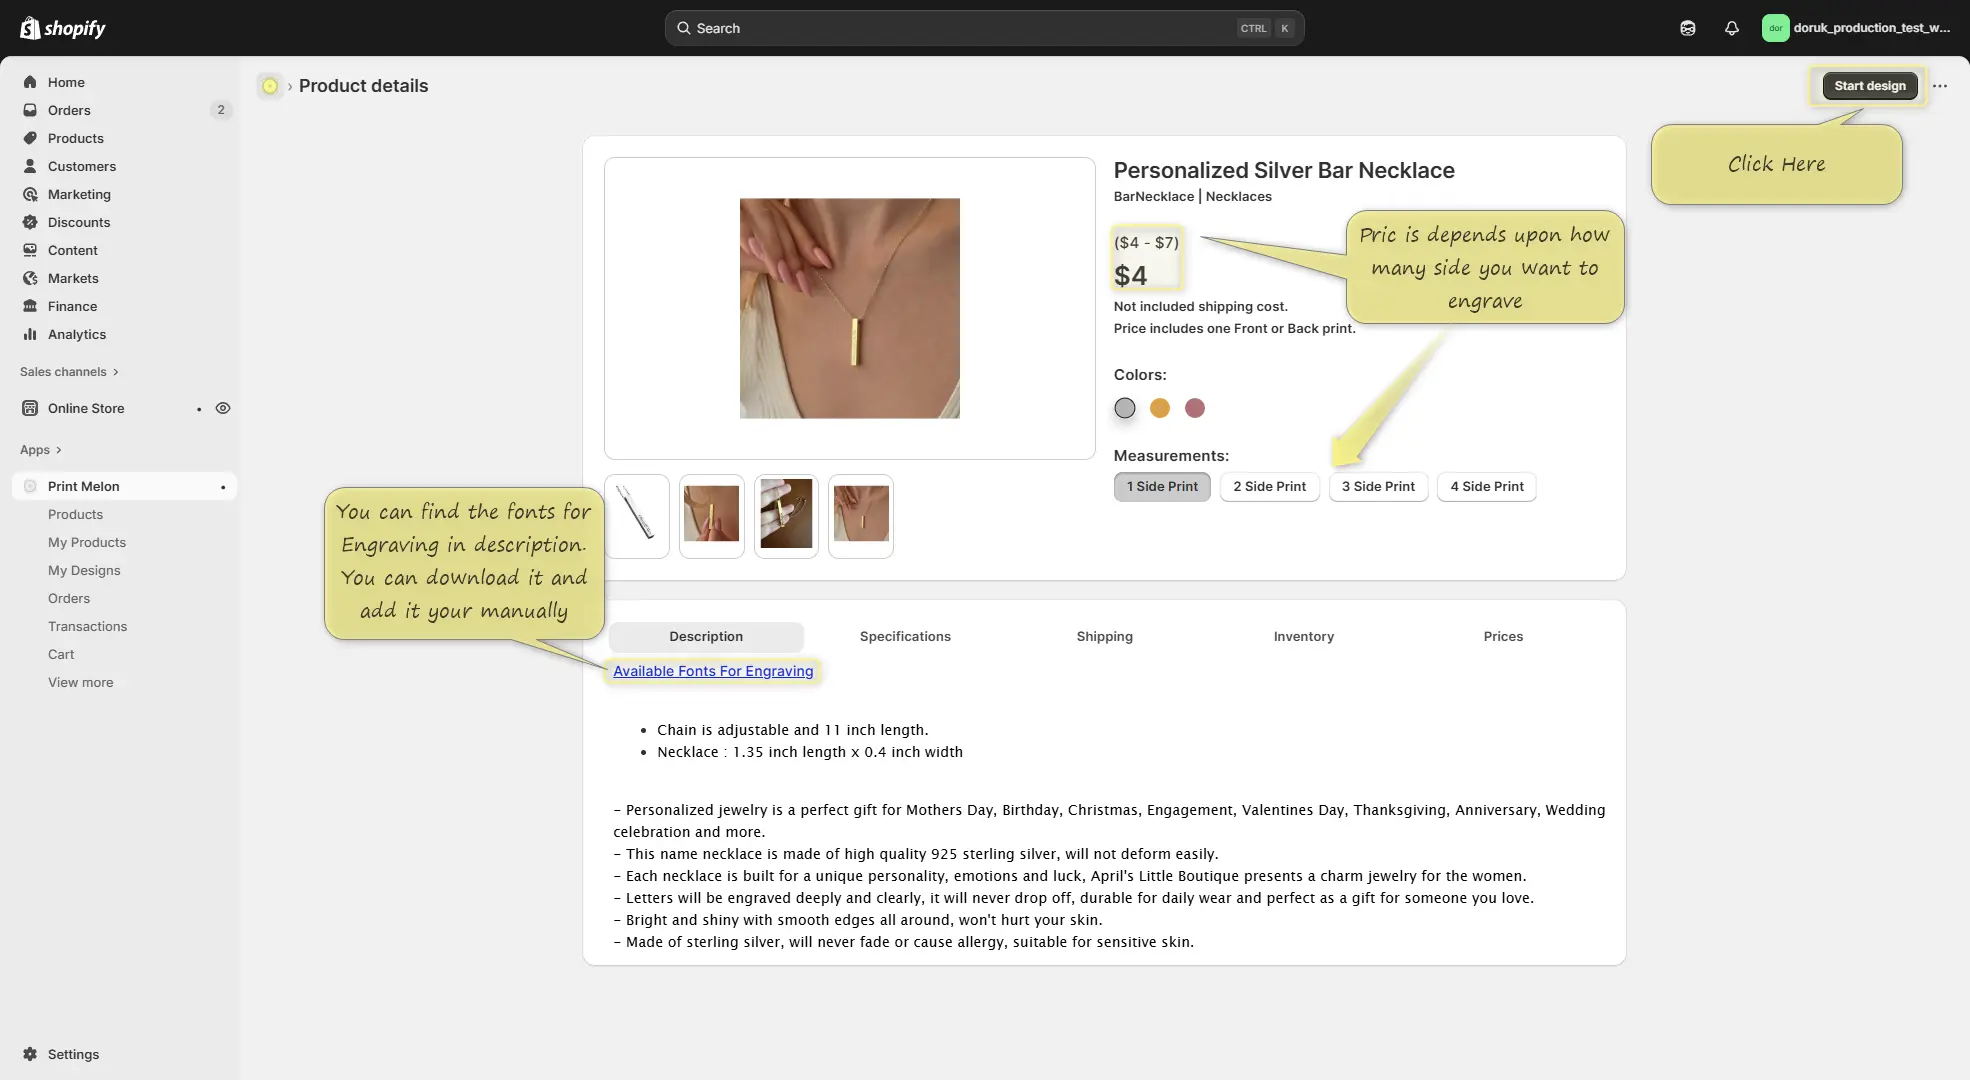
Go to Product Details page and click on Start Design
Step
3
Save your product
Save your product without adding any design. Any design added at this stage will not be printed and may unnecessarily increase the product price.
• Do not upload artwork or personalization yet.
• Simply save the product and continue to publishing.
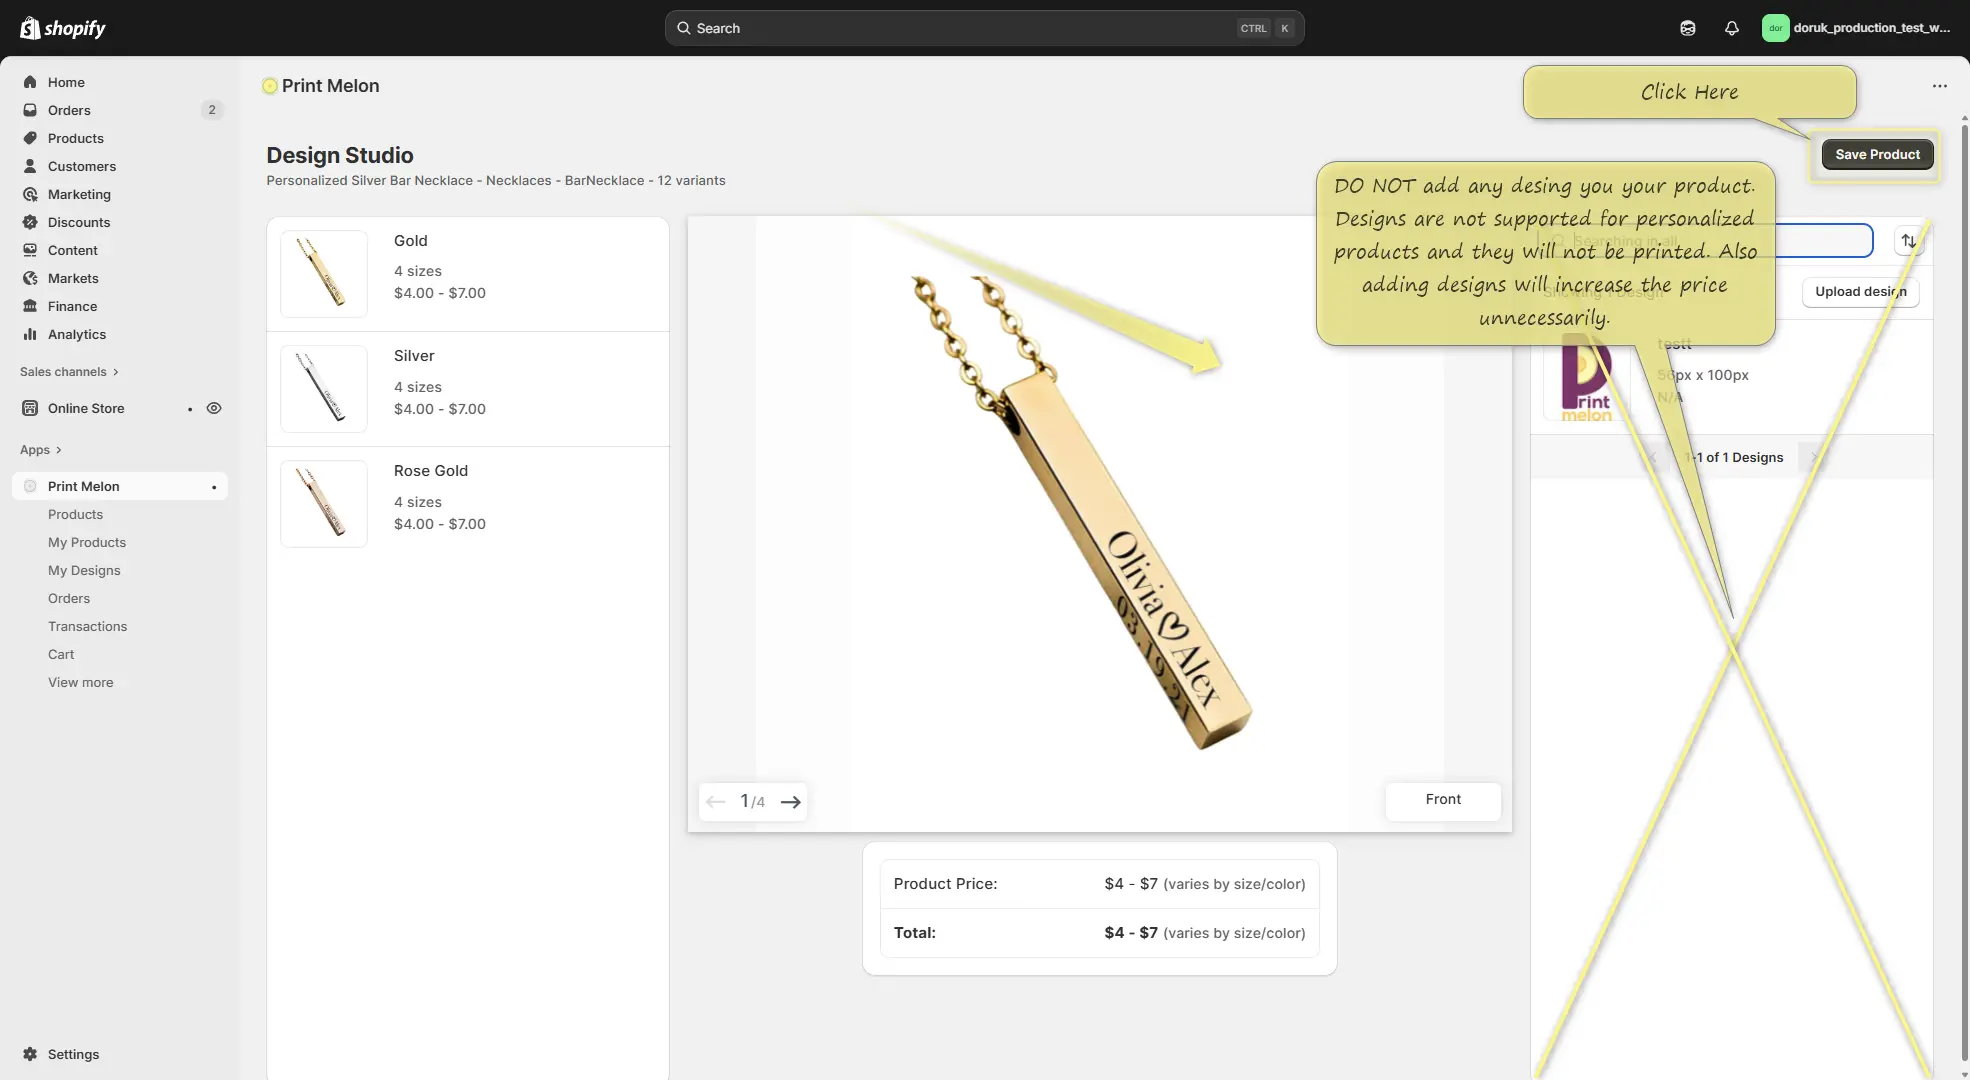
Save your product without adding any design
Step
4
Publish your product
Create a publish profile, choose the print options you want to offer, then publish your product to your connected Shopify store.
• Add the available fonts as a product image instead of including a link in the description.
• Product pricing changes based on the selected print options.
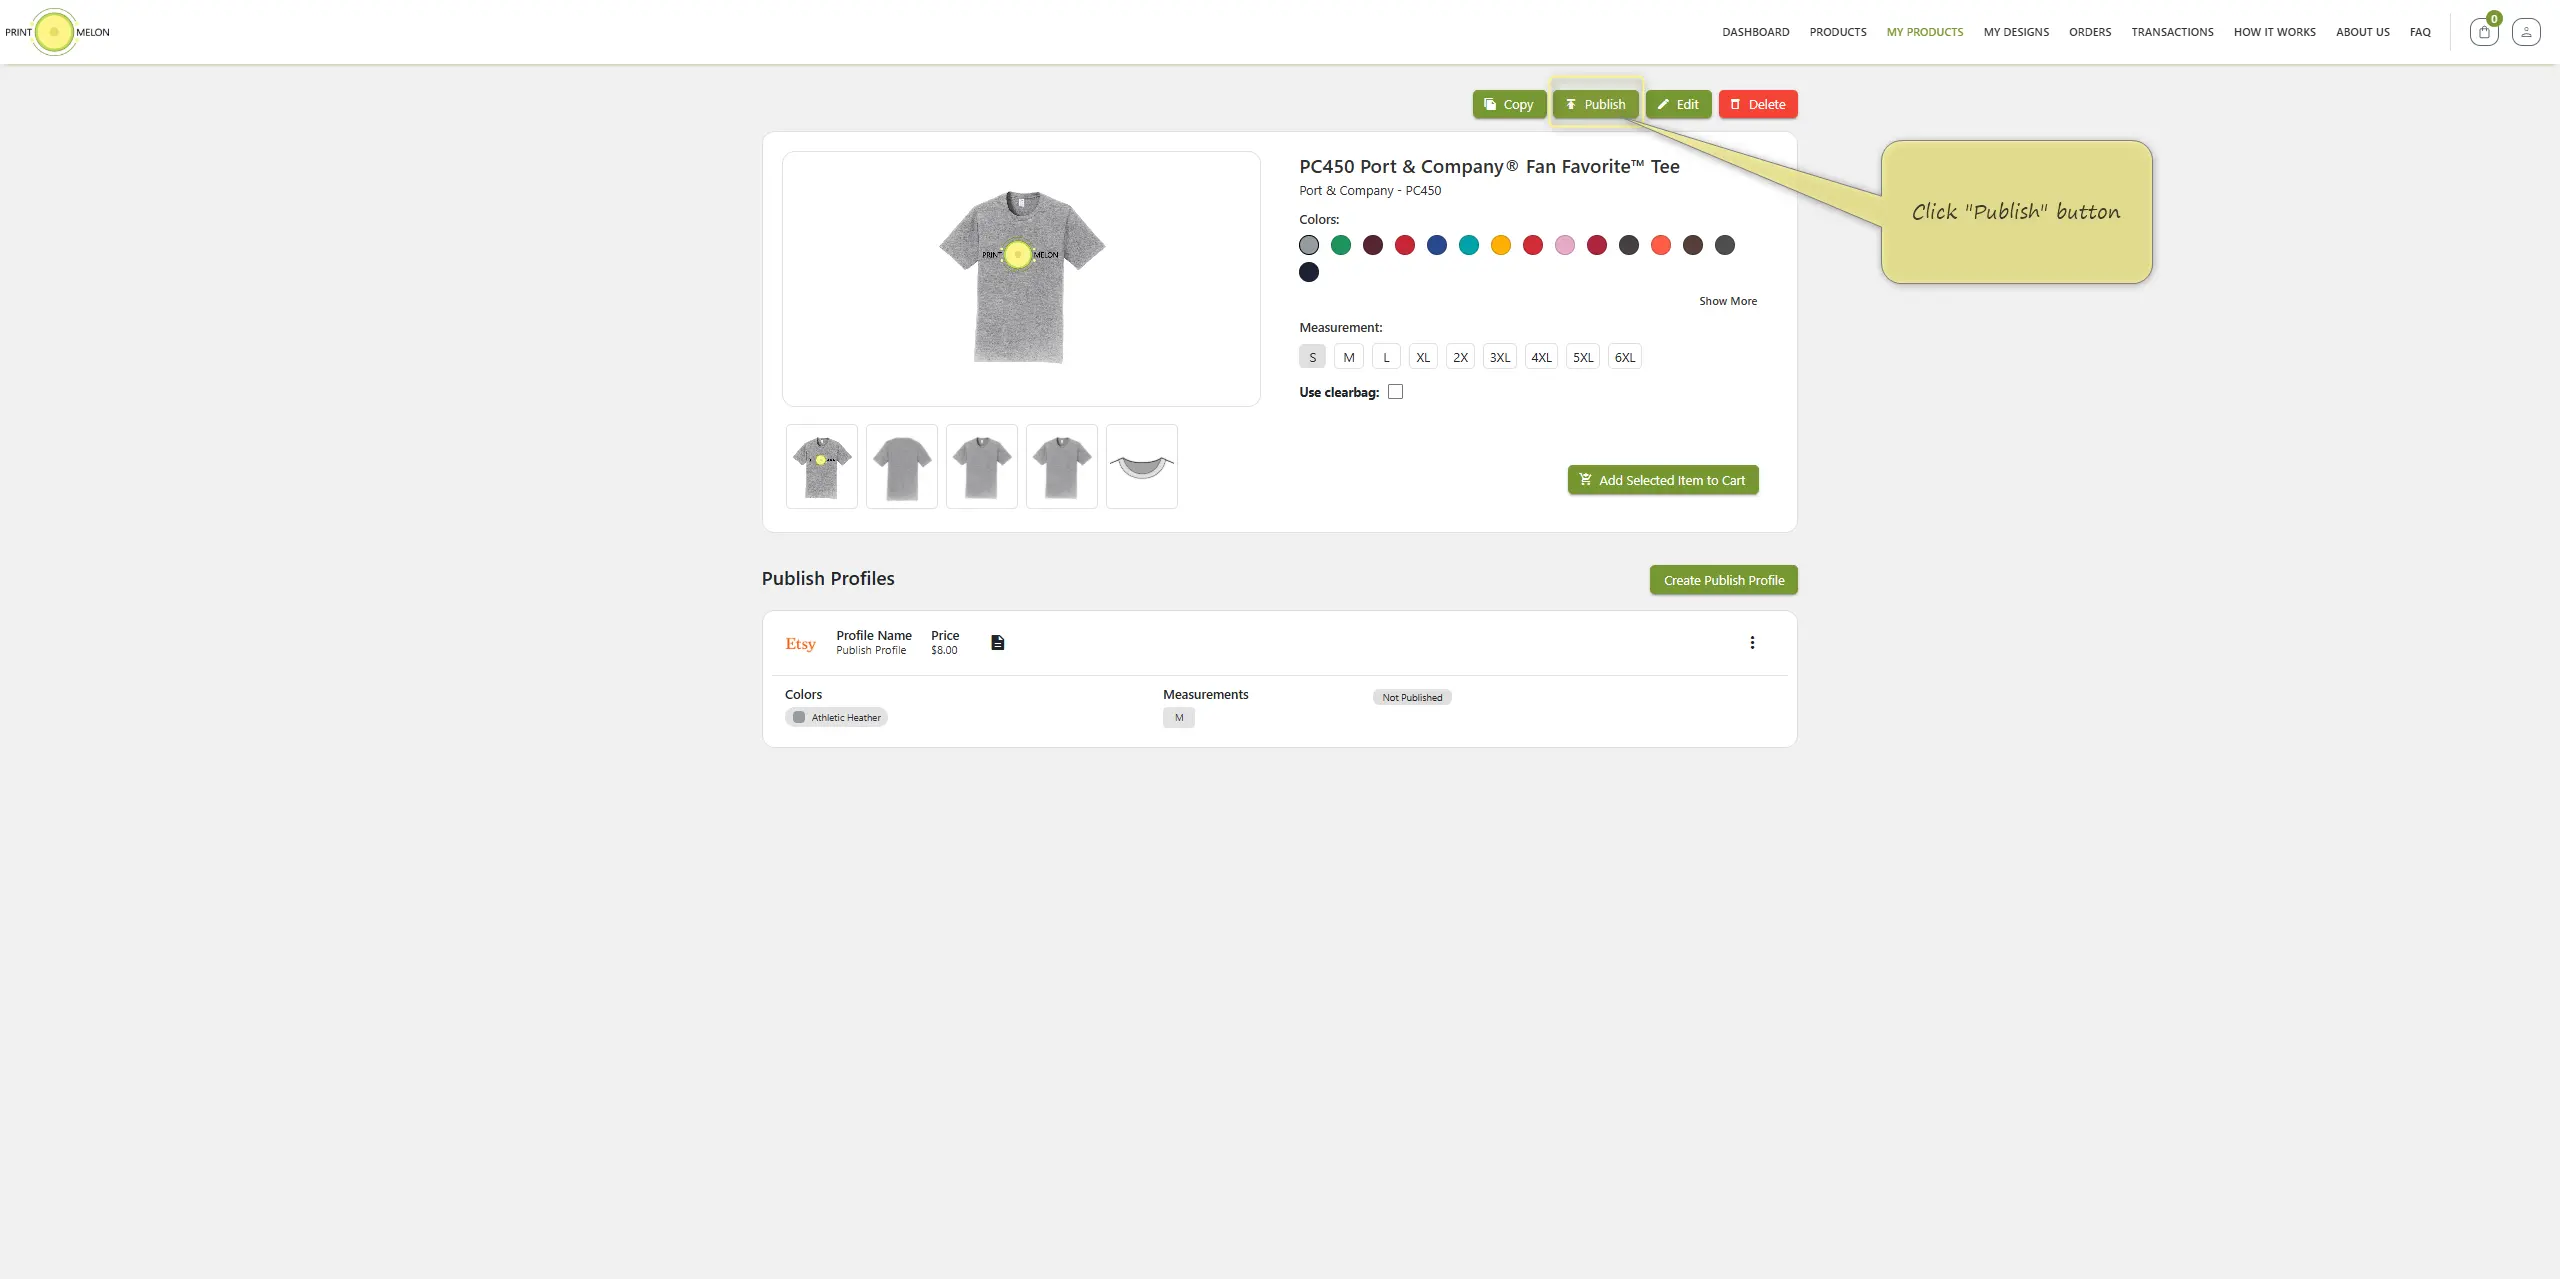
Create Publish Profile and publish your product
Step
5
Add personalization to your Shopify store
Shopify doesn’t support product personalization out of the box. Install a third-party personalization app to collect your customers’ personalization details.
• Choose a personalization app that fits your store’s needs.
• Make sure customers can easily enter their personalization before checkout.
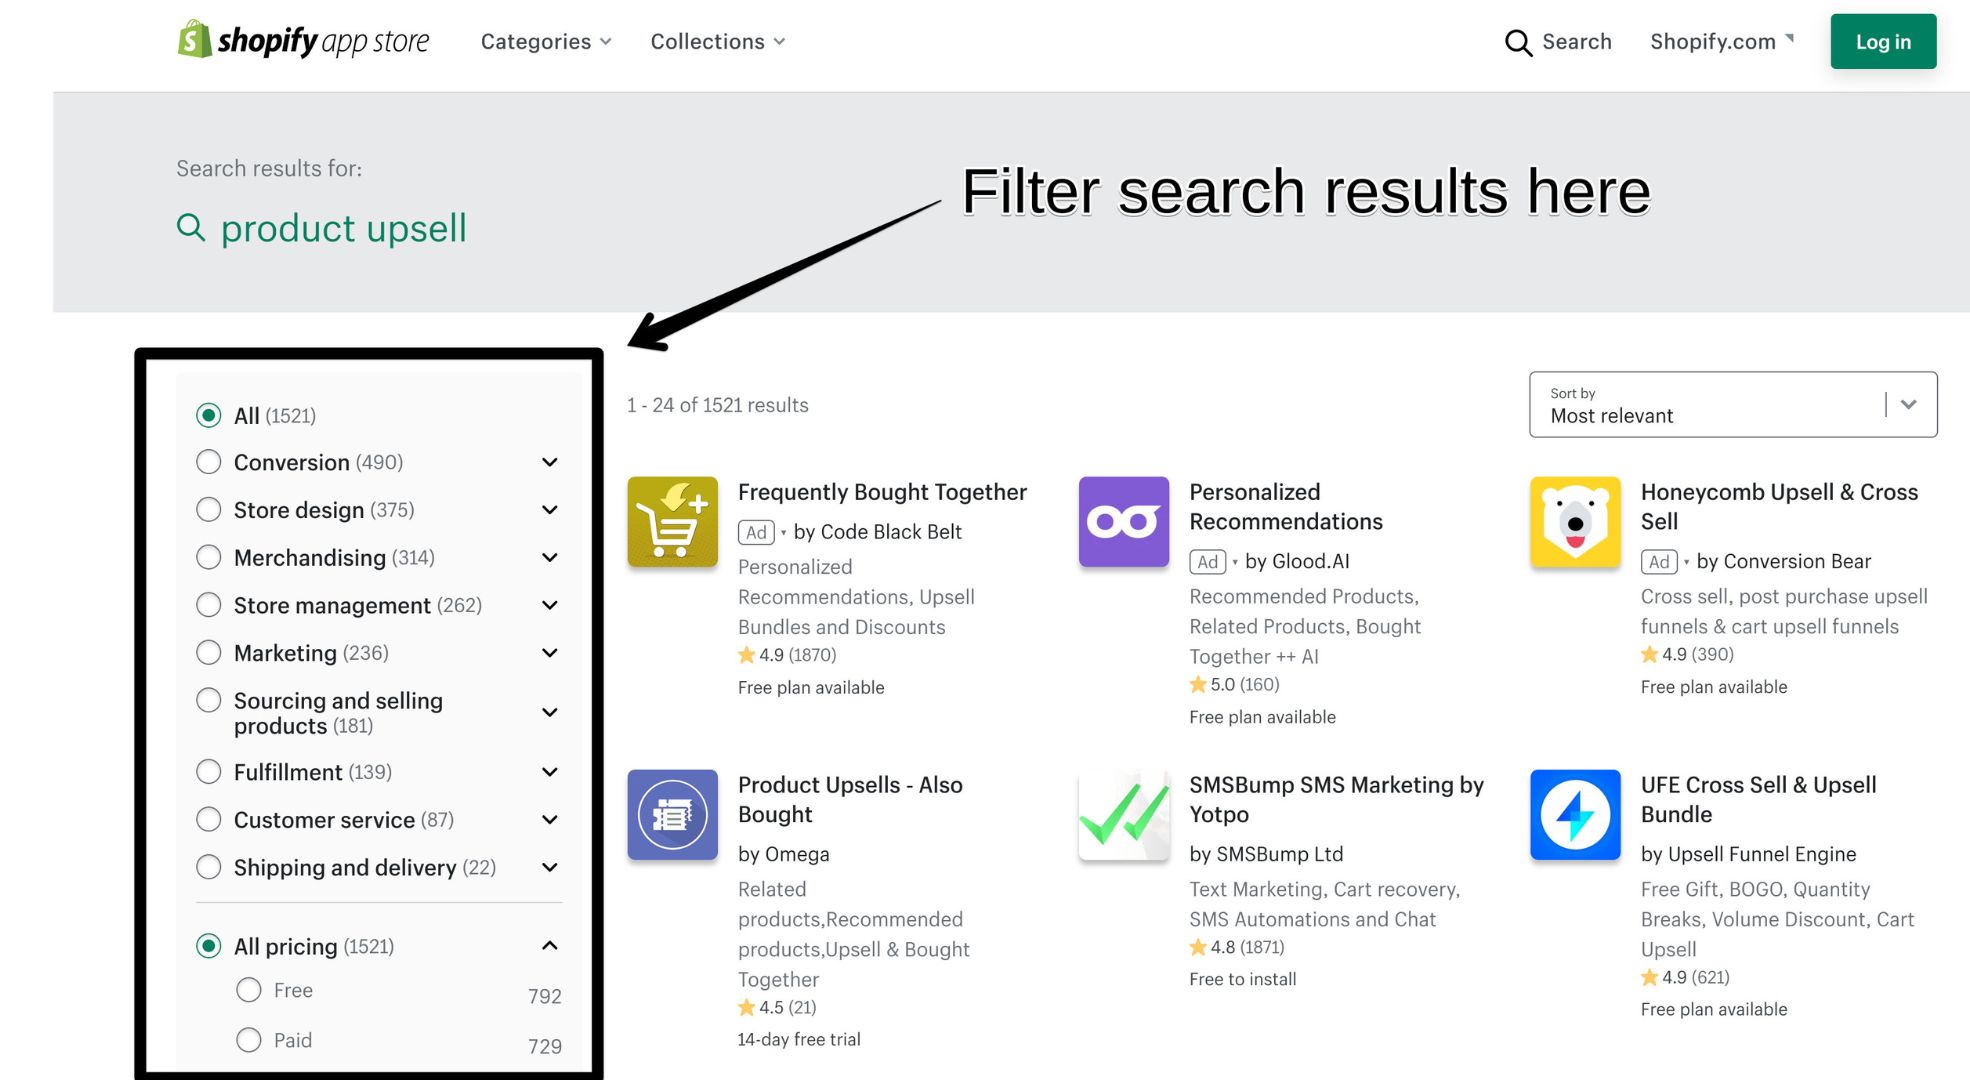
install a third-party personalization app
Step
6
Personalized Order Warning
When a customer orders a personalized product, PrintMelon will display a warning because the personalization details are not automatically received from Shopify.
• Choose a personalization app that fits your store’s needs.
• The warning will remain until the personalization has been added.
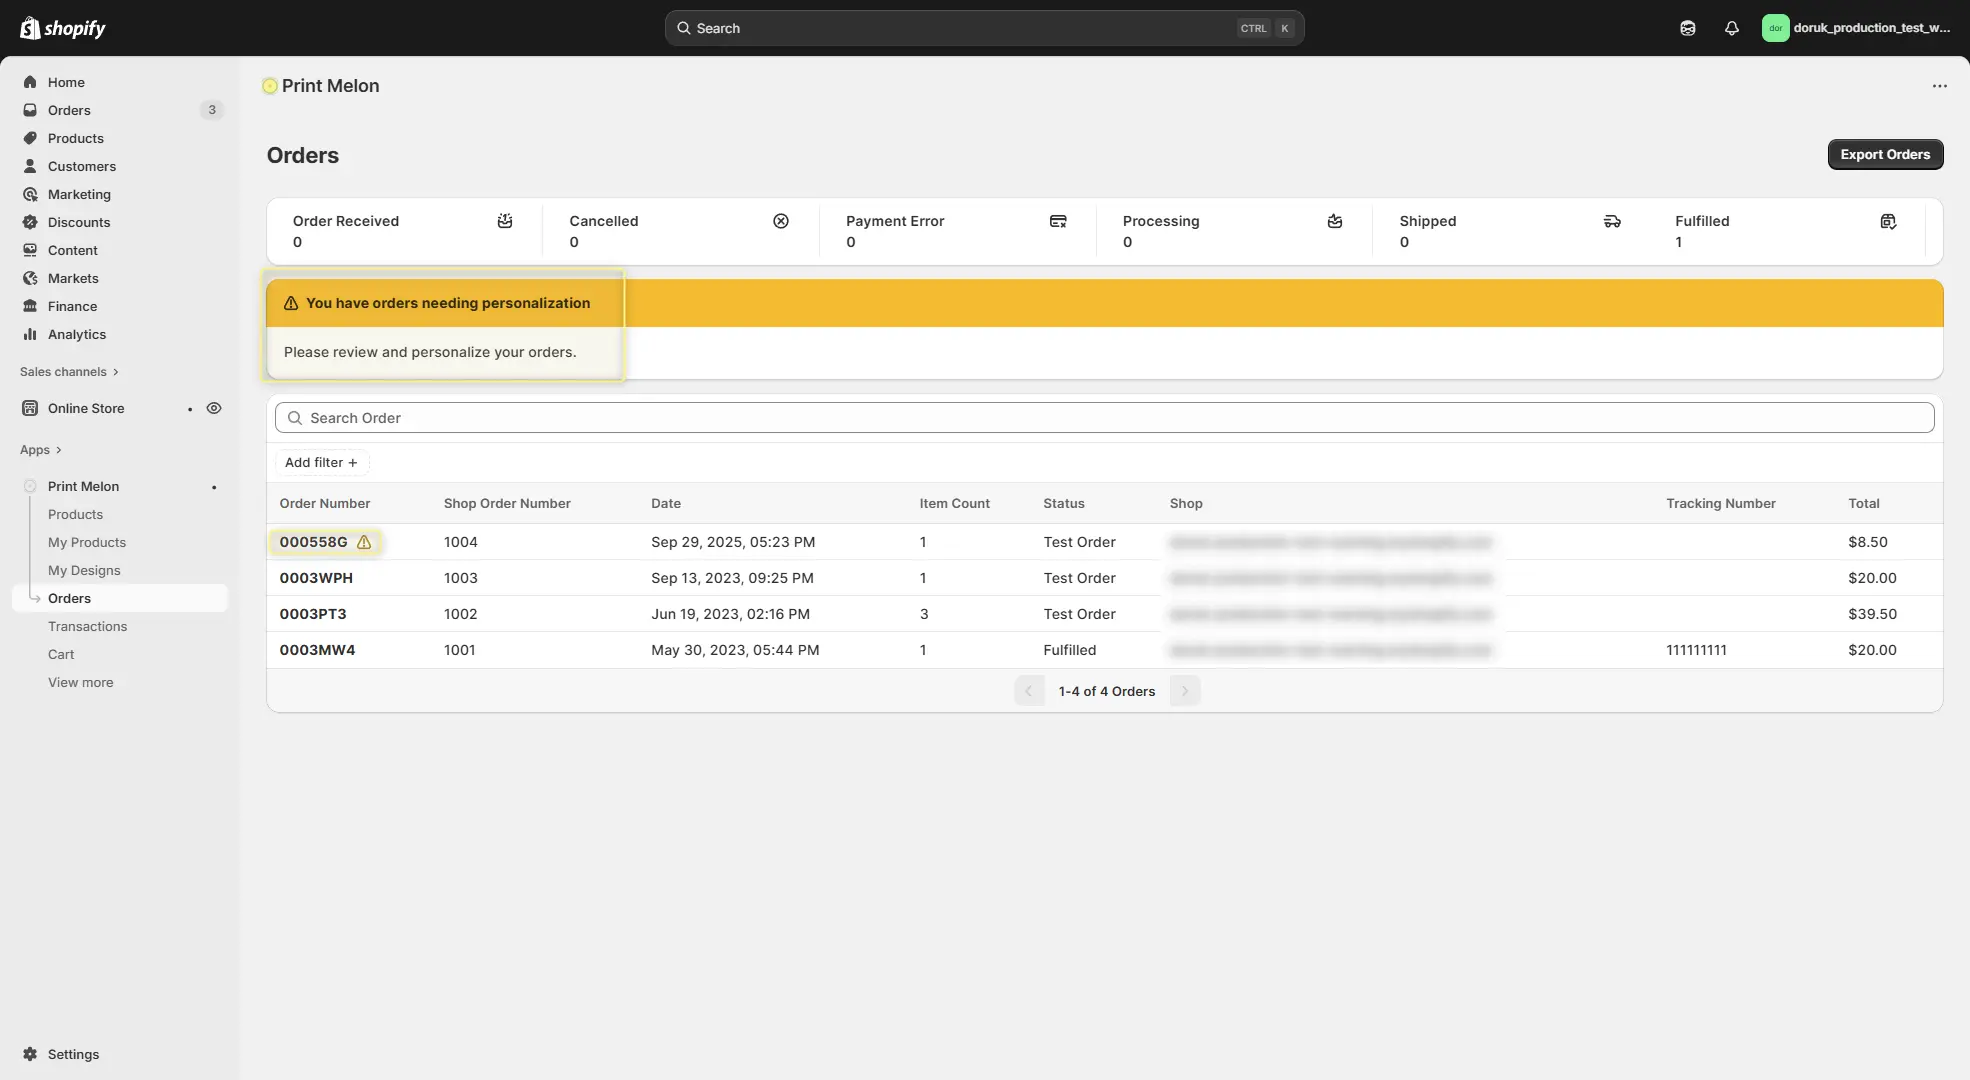
Review the personalization warning
Step
7
Add the personalization text
Enter the personalization details provided by your customer and save them to the order before production begins.
• Copy the personalization exactly as provided by the customer.
• Orders cannot be fulfilled until the personalization has been added.
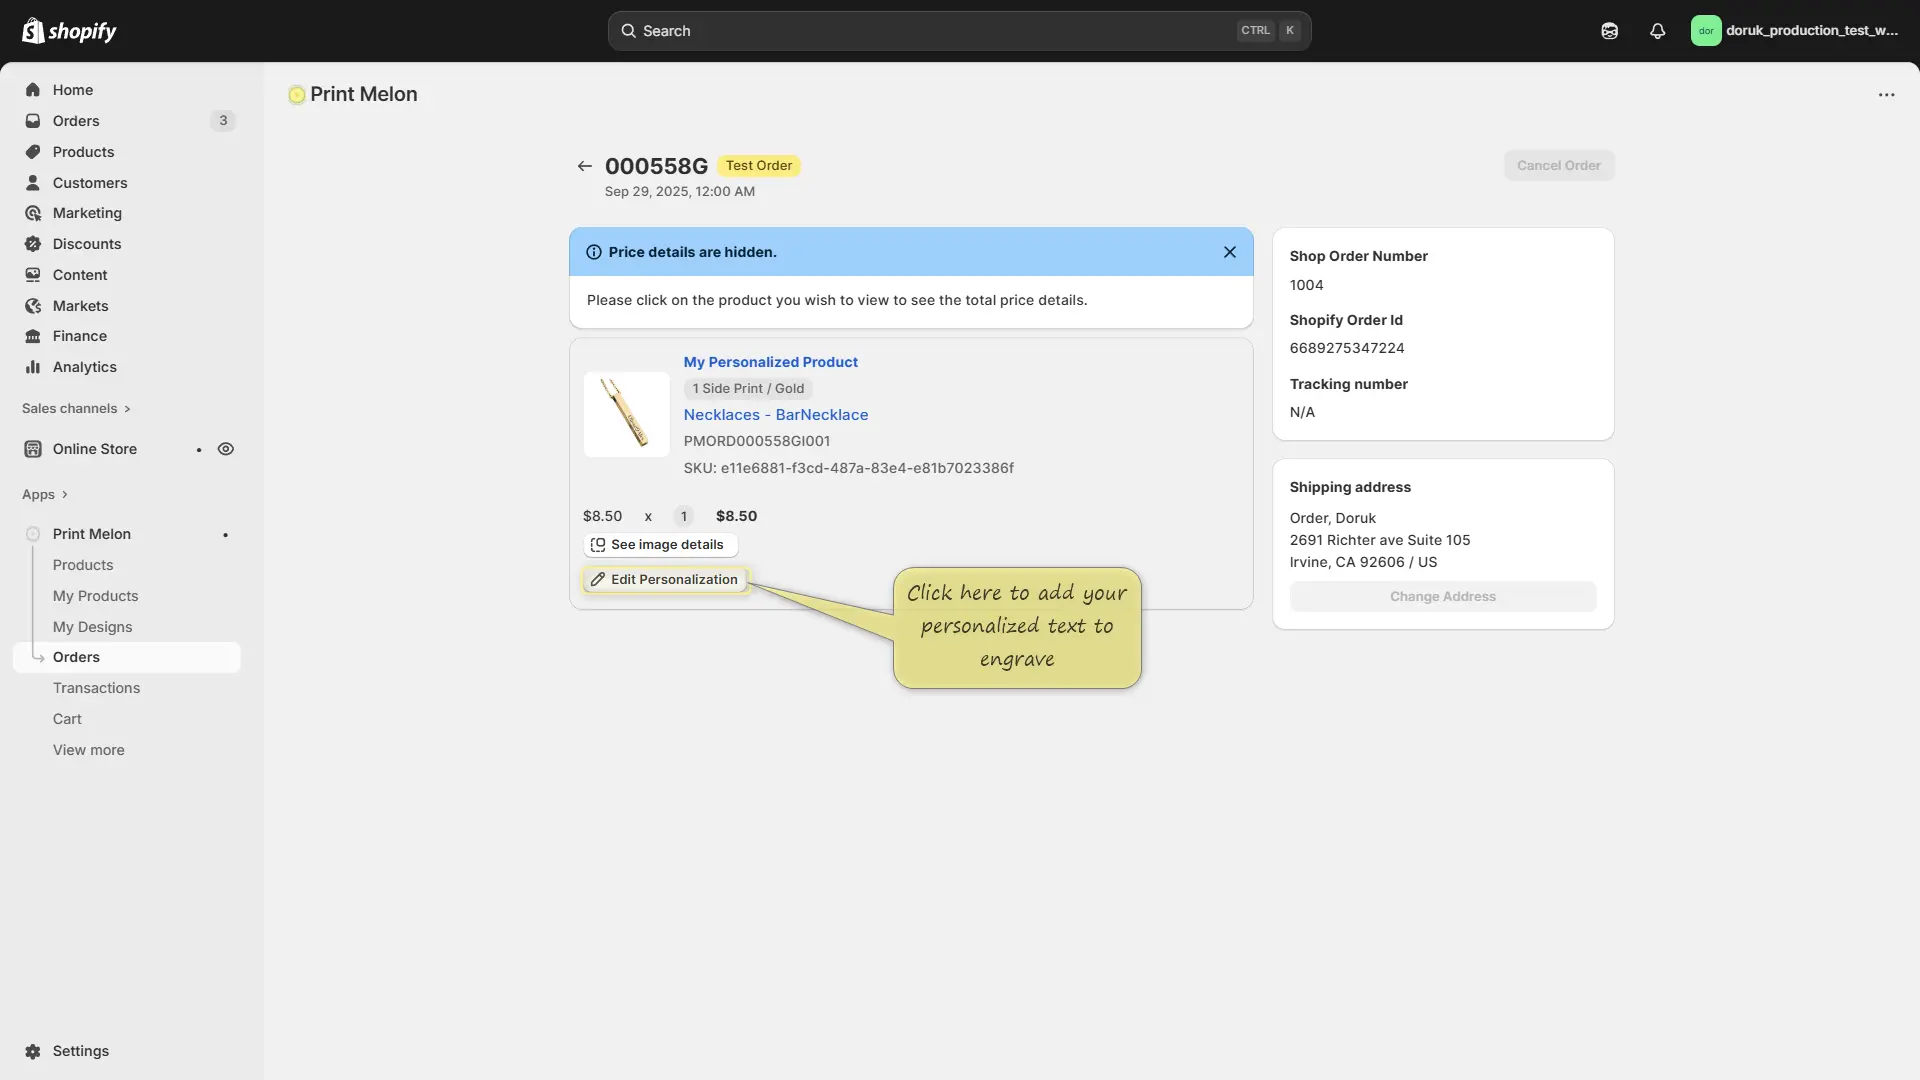
Add The Personalization Text To Your Product
Step
8
Save the personalization
Review the personalization details, then save them to the order. You can edit the text until production begins.
• Double-check spelling and formatting before saving.
• Once the order has been printed, the personalization can no longer be edited.
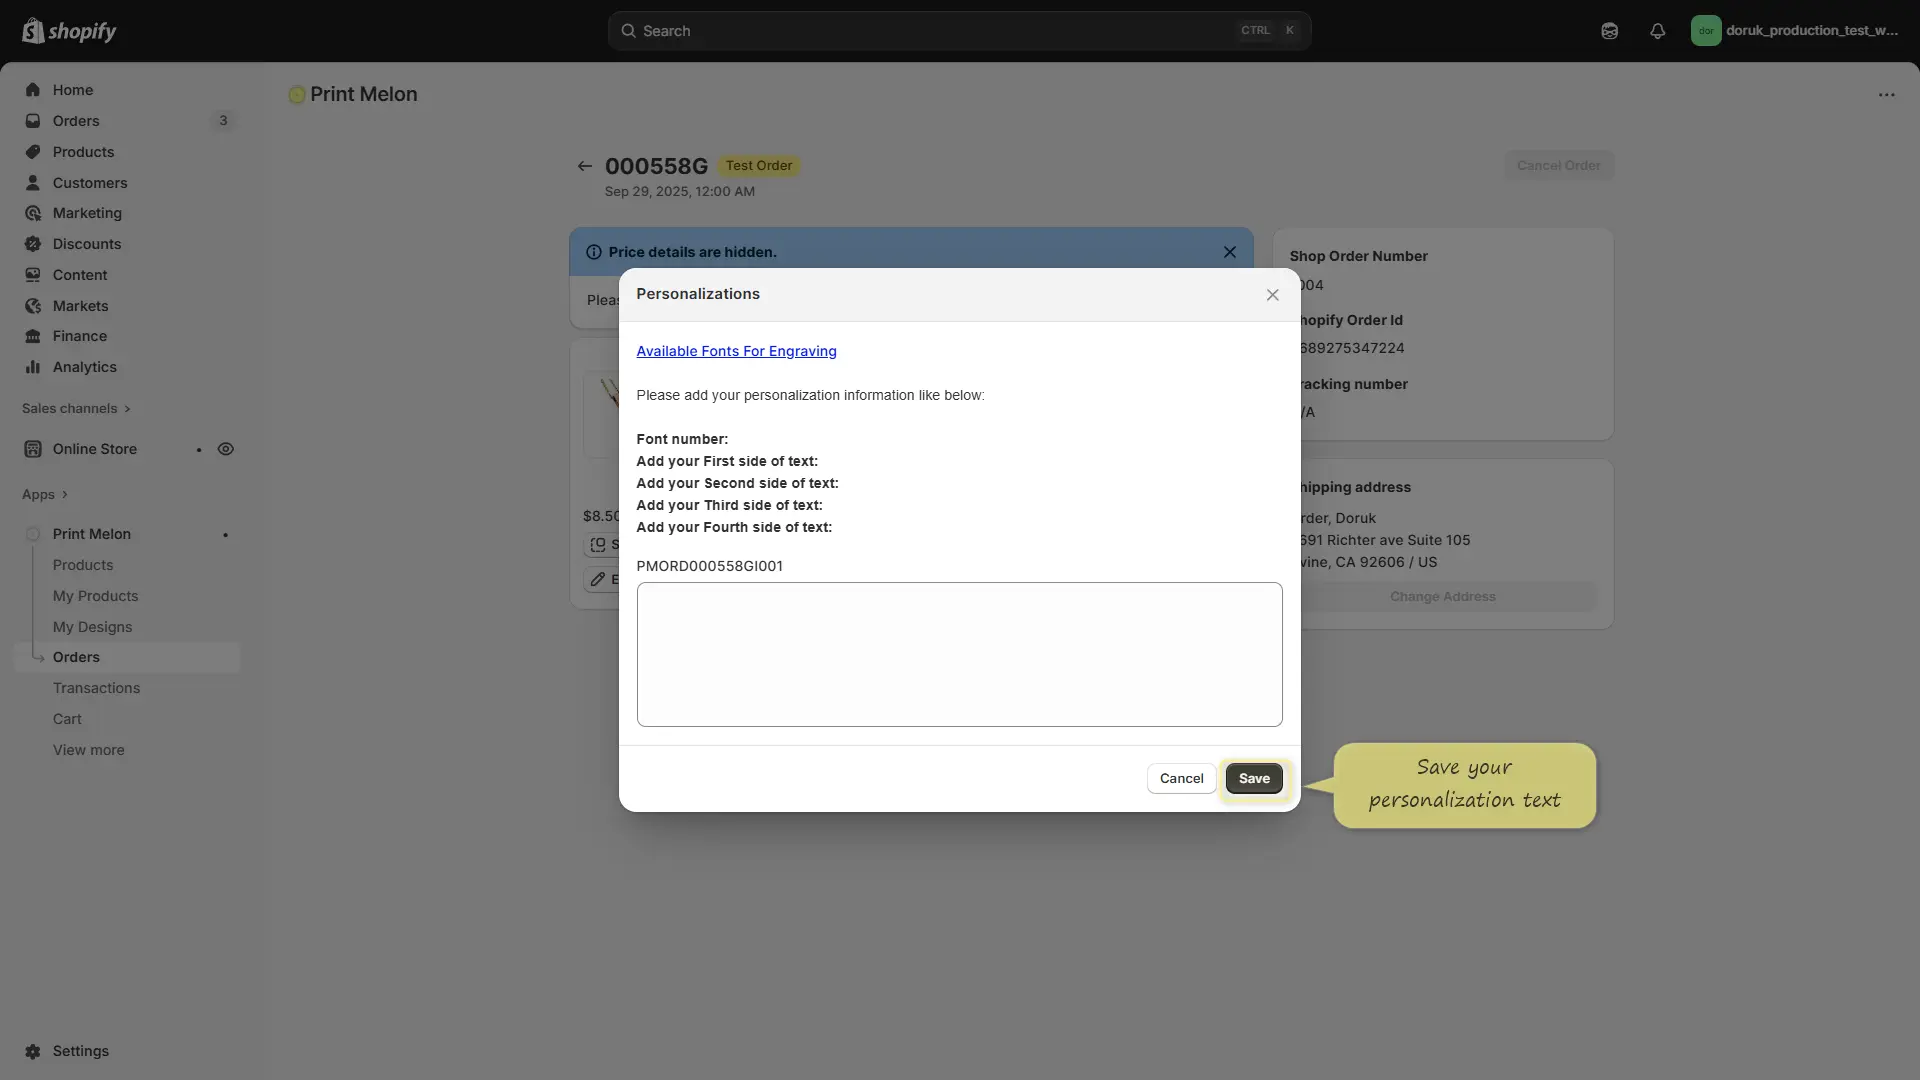
Save The Personalization Text
Step
9
Add The Personalization Text To Your Product
Add the personalization text you have received from your customer.
Warning: Your order cannot be fulfilled until you have added the text.
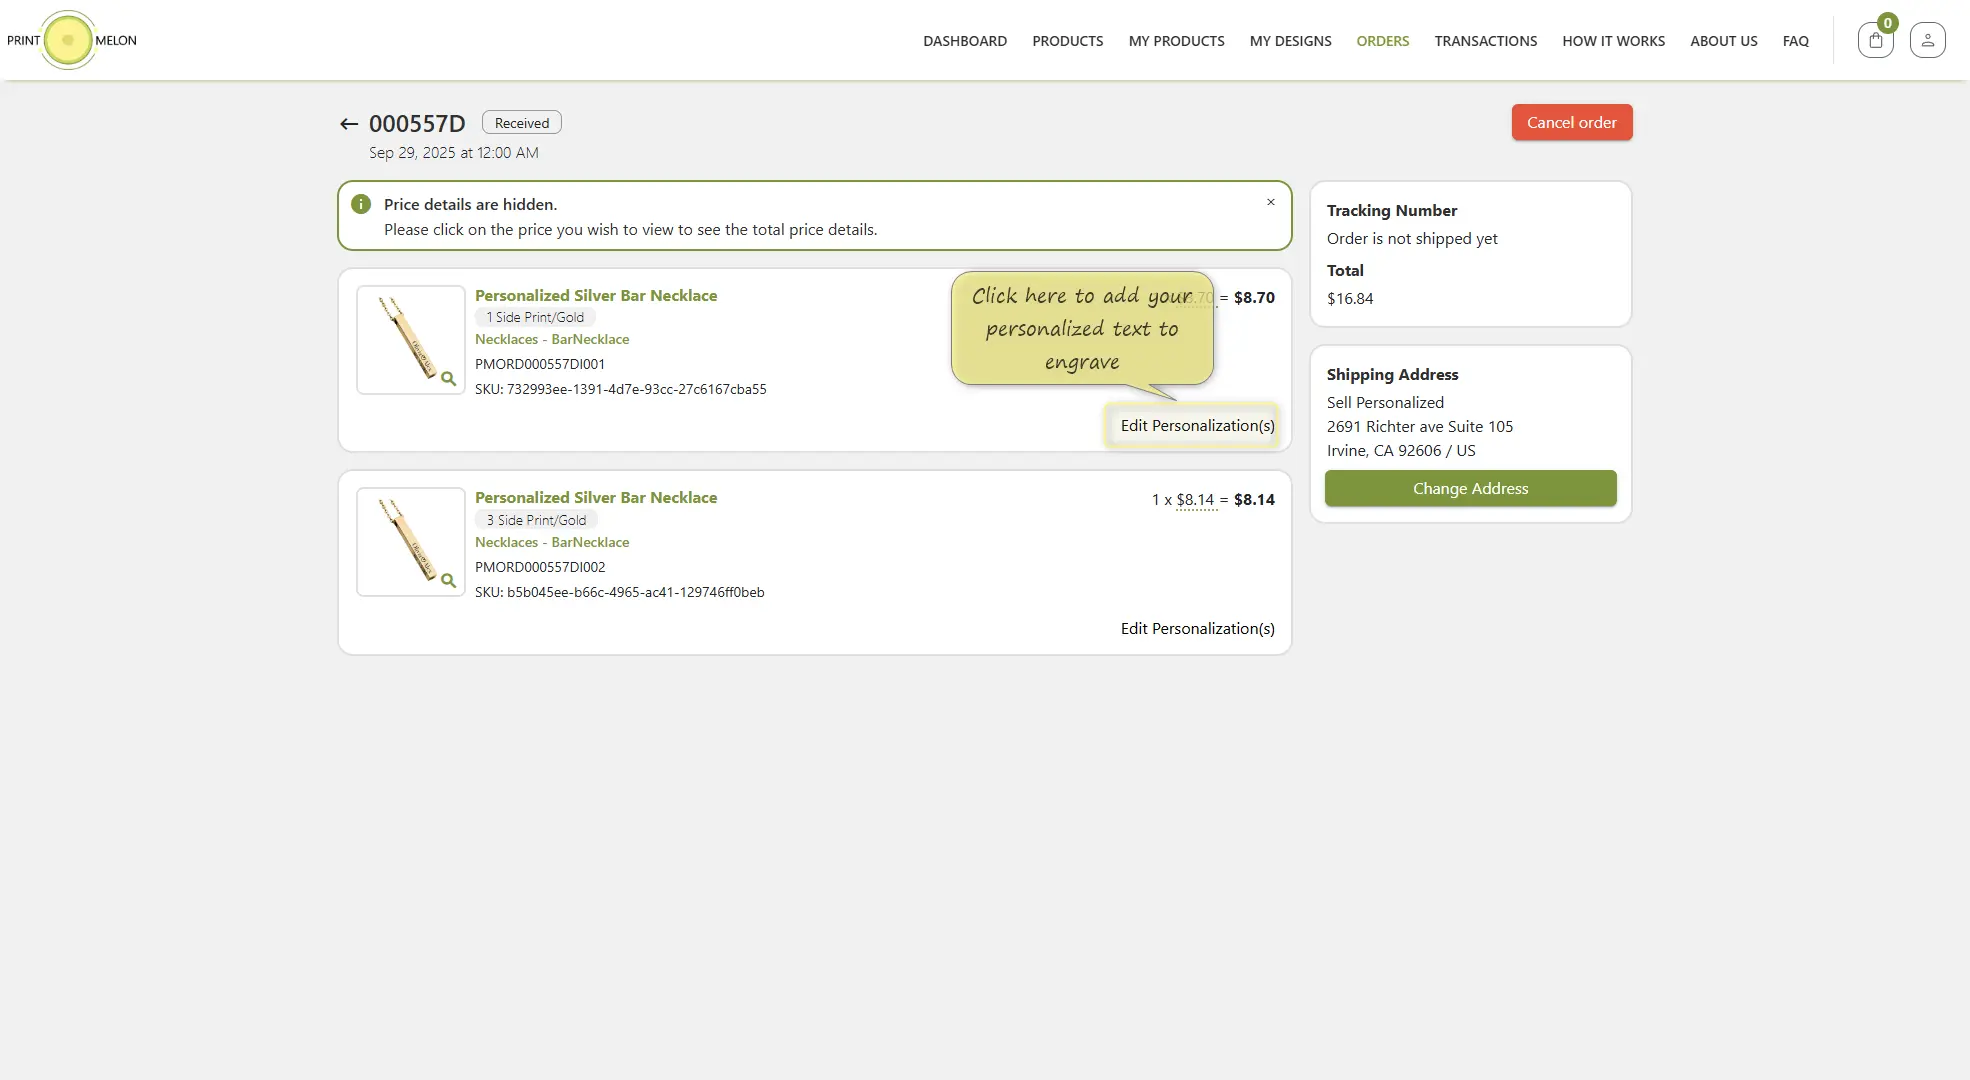
Add The Personalization Text To Your Product
Finished
10
Save The Personalization Text
Add your personalization text according to instructions and save it.
You can edit it until your order is printed. After your order is printed, editing the text will not be possible. Your item will be personalized according to your text and shipped.
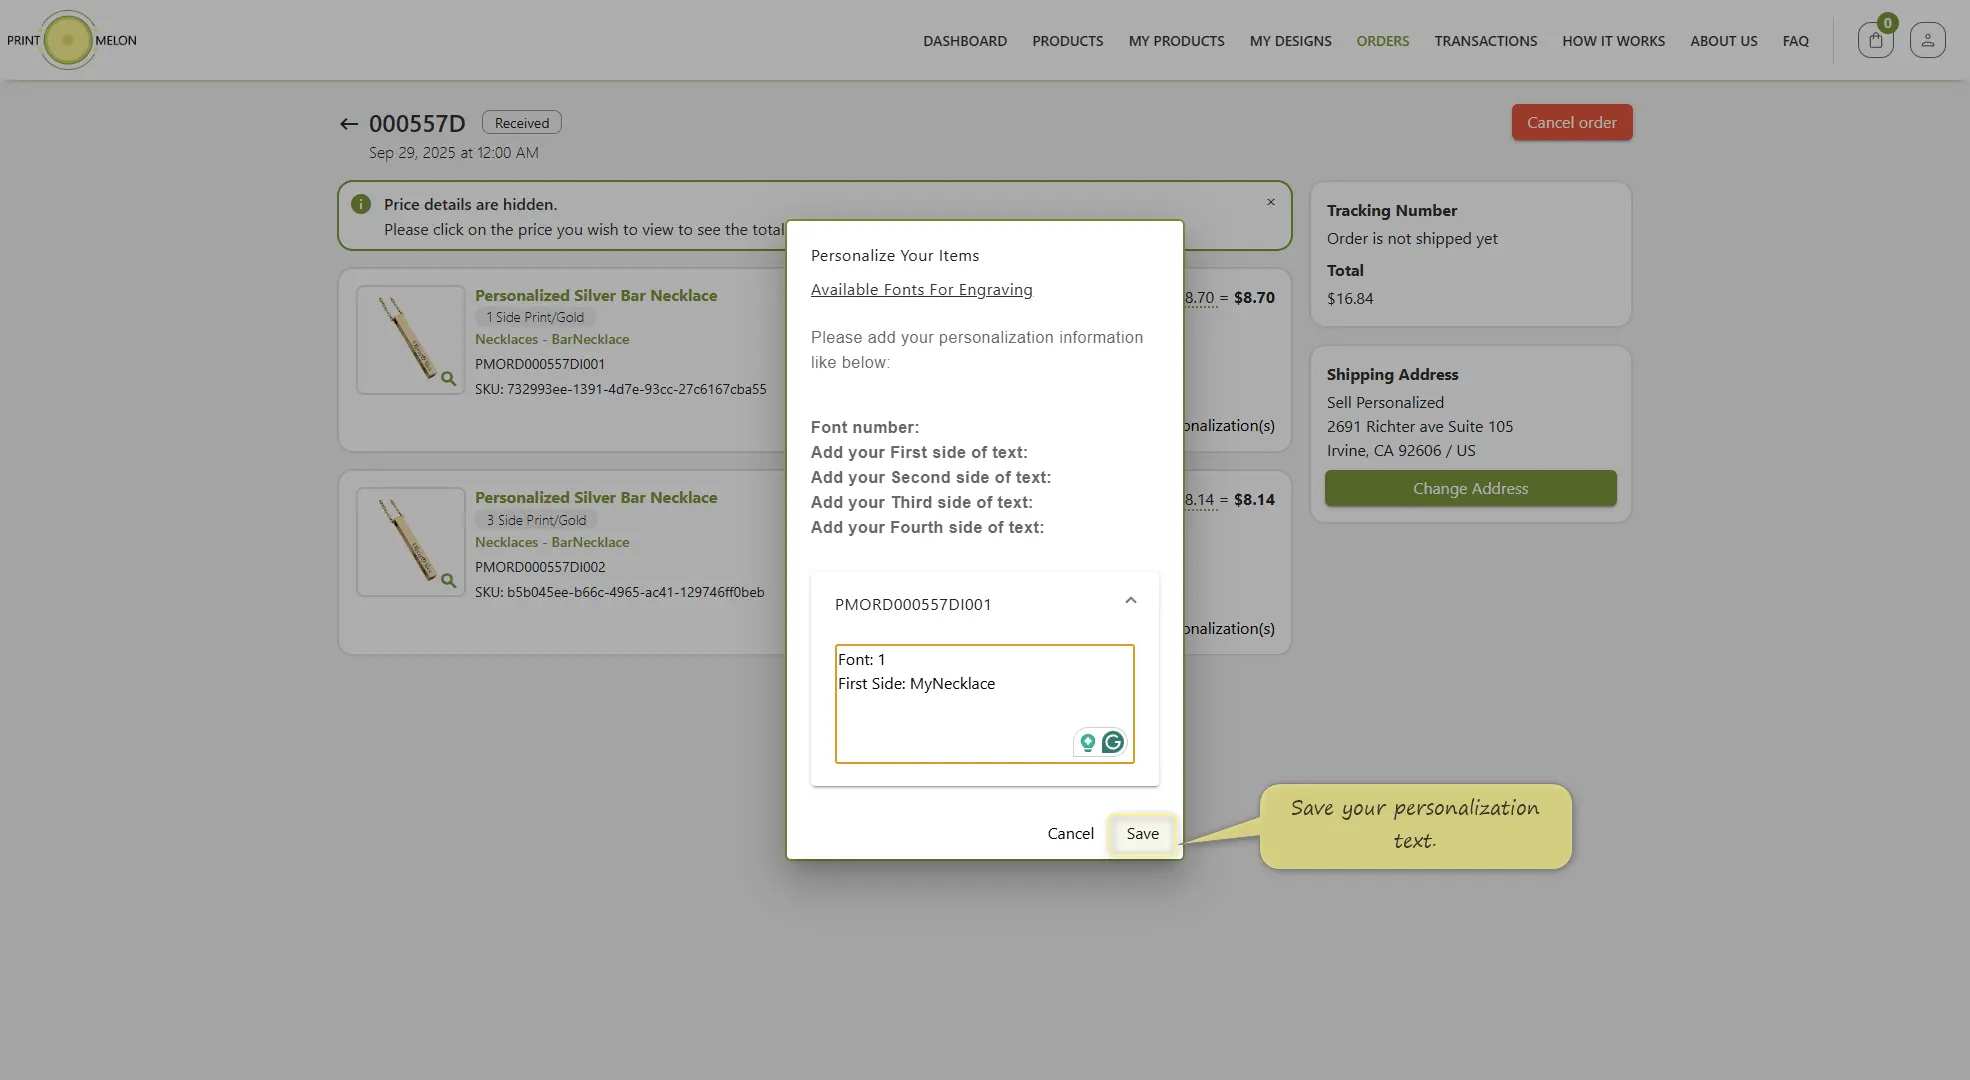
Add your personalization text according to instructions and save it.
Seller-friendly support
Turn a technical guide into a clear product page.
Visual proof
Each major step includes the original guide screenshot so users can recognize the PrintMelon interface.
Plain instructions
Every action is rewritten as short, scannable guidance with the exact buttons users need to click.
Conversion ready
The layout keeps the premium SaaS style while guiding sellers toward publishing confidently.